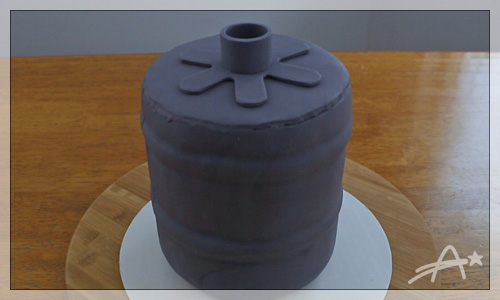
3D Keg Cake
Create a cake that looks like a Keg!
Materials & Supplies
– Vanilla Cake & Buttercream
– Fondant & Smoother
– Tylose Powder
– Gel Food Coloring & Piping Jelly
– Cake Pan, Knife, Icing Spatula & ruler
– Parchment Paper & Tape
– Silver Luster Dust, Vodka & Paintbrush
– Round Cookie Cutters
– Fondant & Smoother
– Tylose Powder
– Gel Food Coloring & Piping Jelly
– Cake Pan, Knife, Icing Spatula & ruler
– Parchment Paper & Tape
– Silver Luster Dust, Vodka & Paintbrush
– Round Cookie Cutters
This was my 2nd or 3rd attempt at a 3D cake. Given the experience I think I did a pretty good job.
I started with 3 6inch vanilla cakes. I leveled each one and cut them in half giving me 6 layers. I iced the first 3 layers and added dowels for support. Then I added a divider cakeboard. This is recommended when making a taller cake. Then I added the next 3 layers. I added one more dowel down the center of everything (yes, even puncturing through the middle cakeboard). Then you want to crumbcoat your cake.
I flipped my cake over onto another cakeboard so I can round the bottom edge. Then flipping it back to right side up I added another layer of buttercream. I tried to make this layer as smooth as possible. Time to color some fondant! I used black gel food coloring to color a small section of the white fondant. After that small piece is good and combined you want to knead it into the larger piece. Then just keep kneading it until it doesn’t show any streaks. And yes, this is your arm workout for the day. I rolled out some fondant and cut a few strips that will be the edging on the outside of the keg.
Rolling out more fondant I cut a piece the height of my cake. I smoothed that the best I could really creasing the edge of those strips from earlier. I added a top and trimmed the edges. Not my finer work I must say, but still not bad. Making the fondant details. I added tylose powder to my fondant and kneaded it until it was combined. It’s suppose to help the drying speed and make it nice and durable. I cut out the “starfish” shape for the top and created the small inner ring. All these grey pieces will get a coat of silver later on.
Making the pieces for the spigot. I added tylose powder to the fondan again. I rolled out a snake of white fondant and cut out my shapes. Using a skewer I added the lines and indents into my pieces. I set those aside to harden overnight. I also pre-added the holes that will hold the toothpicks.
I added my “starfish” to the top of the cake along with that small circle. I added 2 containers of silver luster dust with one tablespoon of vodka. Alcohol helps the paint to dry faster than regular water. I gave everything a good coat of silver, knowing that a second coat would be needed. I also painted the handle part of the cake. I attached the handle with some piping jelly and painted everything a second time. It wasn’t too bad. Still a little streaky.
I did give it it’s third coat of silver. I attached the spigot with a dowel. It was really heavy though so I ended up melting a bit of white chocolate to use as glue. And that’s it. I love how this turned out and the recipient loved it!
Show/Hide Comments (0 comments)


0 Comments